

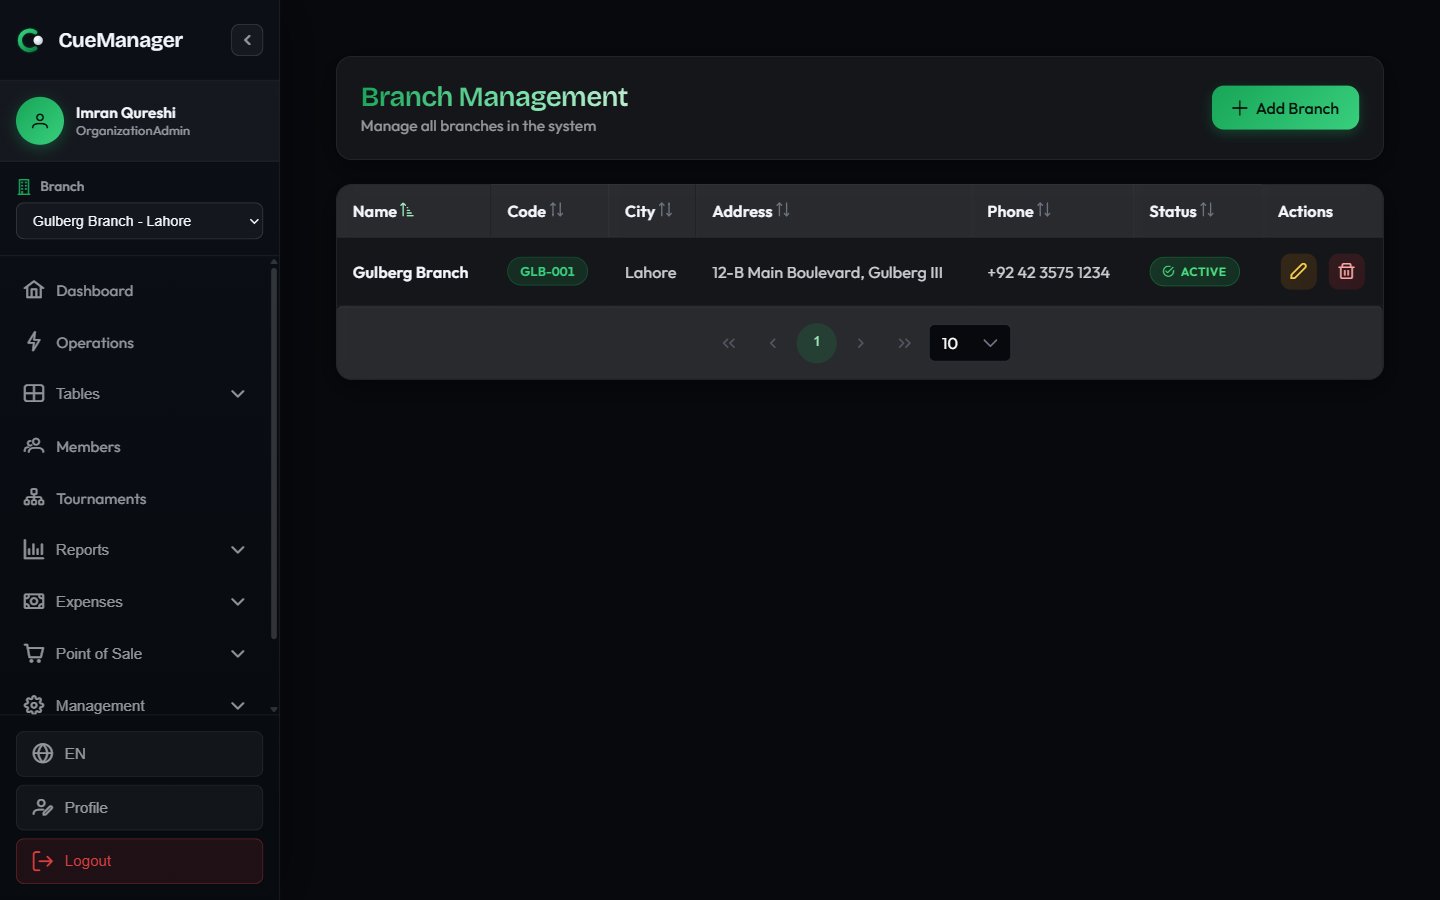
The branch list, showing code, city, address, and status for each location
Add a branch
1
Open the form
Go to Management → Branches and select Add Branch.
2
Identify the location
Enter Branch Name (for example, Gulberg Branch), Branch Code in the format XXX-00 such as LHR-01, City, Address, and optionally Phone.
3
Set the time zone
Pick a Time Zone. This sets the branch business day used for reports and POS sale numbering, so a session that ends at 1 am is bucketed into the right trading day.
4
Set the rates
Fill in Pricing Rates — Rate Per Frame, Rate Per Hour, and Rate Per Minute — then optionally Pool Table Rates.
5
Choose the options and save
Leave Active checked, decide whether to tick Enable open tabs (running bills) for this branch, and select Create.
Rates
The rates on the branch are the defaults that the Start Session dialog pre-fills. Staff can still override the rate on an individual session, and a table can carry its own override — see Managing tables and How billing works.
Pool Table Rates (optional) holds a second set of the same three fields for pool tables. Each field shows Same as base rate as its placeholder: leave it blank and pool tables are charged at the snooker rates above. Fill it in when a pool frame at Gulberg Branch costs less than a snooker frame.
Rates are per branch. Two locations of Crown Snooker Club can charge different amounts for the same game, and each branch’s revenue is reported separately.
Player self-scoring
Player self-scoring on the branch form decides whether players at this branch may record frame winners from their own phones after scanning the table QR. It is off until you tick Let players record their own frames; Confirmation window (default 90 seconds) then sets how long the other side has to object before a result counts automatically. The setting is per branch, so one location can run it while another keeps every frame at the front desk. The whole flow, including what staff see and the limits that bound it, is in Player self-scoring.The leaderboard TV link
Leaderboard TV link on the branch gives you an address to open on a screen in the club. It needs no login, shows the branch’s monthly ranking and highest breaks, and updates as frames are scored. Anyone with the address can see it, so treat it like a poster rather than a password — see Club leaderboard.Switching branches
The branch selector sits in the top bar of the app. Choose a branch from Select Branch and everything below it — the live floor, sessions, POS, tabs, expenses, and report figures — reloads for that location. Staff assigned to a single branch only ever see their own; the owner and SuperAdmin can switch freely.What is scoped to a branch
Because members are club-wide, Ahmed Raza can play at either location and spend the same wallet balance. Because POS items are branch-scoped, Chai at Rs 100 has to exist in each branch’s catalog. See Managing members and Catalog and stock.
Deactivate or delete a branch
To close a location without losing its history, open the branch with the pencil icon and clear the Active checkbox.Related
- Managing tables — add the snooker and pool tables for a branch
- Users and roles — assign staff to a branch
- Reports — figures follow the branch selector and the branch time zone
- Your subscription — your plan caps how many branches you can run