After you verify your email, CueManager opens a six-step wizard that builds your club: the organization, a subscription, your first branch and its rates, the tables on the floor, and optionally your staff accounts. The rail on the left shows Organization, Subscription, Branch, Tables, Team, and Complete, with a progress bar reading Step 3 of 6 and so on. You can go Back at any point, and you can click a completed step in the rail to revisit it. Everything you enter here can be changed later in Settings.
1

Organization

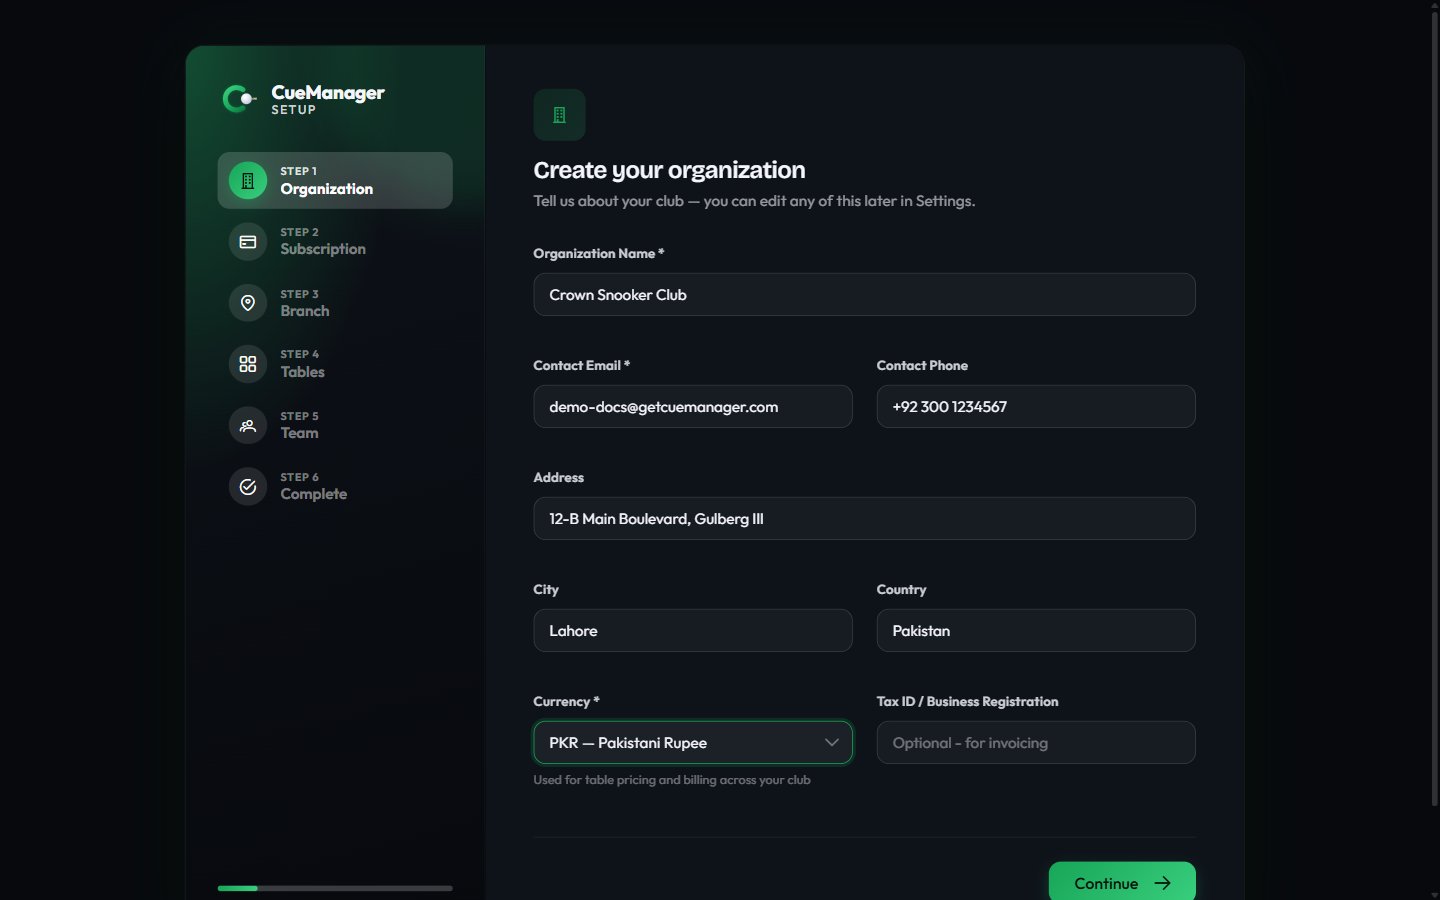
Onboarding step 1 with organization name, contact details, and currency selection

Step 1 names your club and sets the currency used everywhere

Organization Name and Contact Email are required; Contact Phone, Address, City, Country, and Tax ID / Business Registration are optional. For the demo club you would enter “Crown Snooker Club”.Currency is the important one. It is described as “Used for table pricing and billing across your club” and it drives every amount you will see afterwards — table rates, POS prices, wallet balances, and reports. Pick Pakistani Rupee for a club in Pakistan; US Dollar, Euro, British Pound, Indian Rupee, UAE Dirham, Canadian Dollar, and Australian Dollar are also available.
Choose the currency carefully. It is the unit every stored amount is interpreted in, so changing it later does not convert existing prices, rates, or balances.
Choose Continue.
2

Subscription

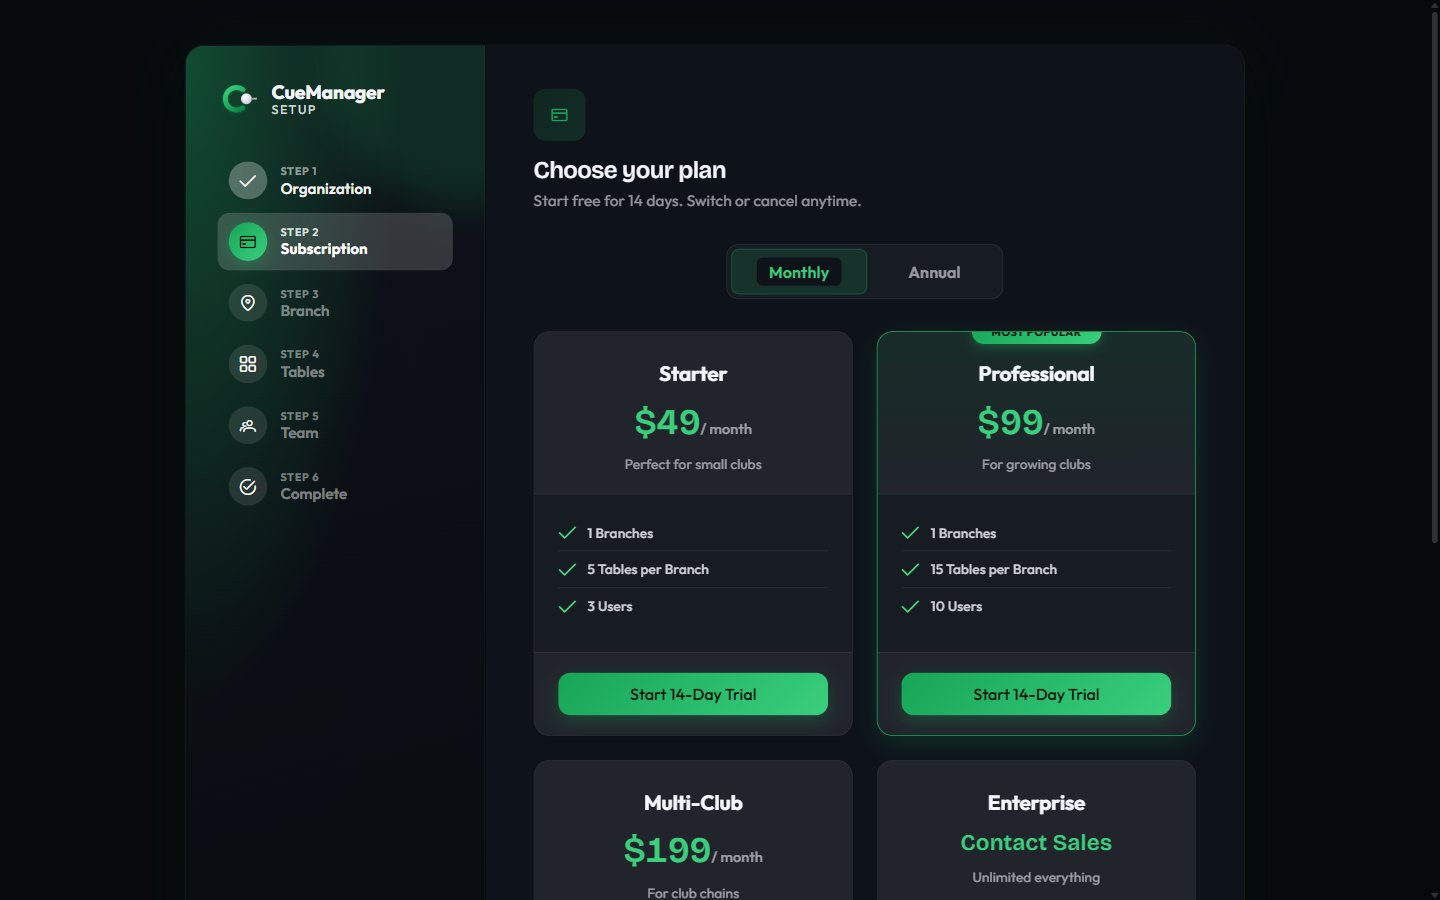
Onboarding step 2 showing subscription plan cards with monthly and annual pricing

Step 2 starts a 14-day trial on the plan you pick

The page is headed Choose your plan — “Start free for 14 days. Switch or cancel anytime.” Toggle between Monthly and Annual pricing, then compare the plan cards. Each card lists its limits: branches, tables per branch, and users, plus extras such as Advanced Analytics, Priority Support, API Access, and Custom Branding. One card is flagged Most Popular.Choose Start 14-Day Trial on the plan you want. Enterprise-style plans without a listed price show Contact Sales instead.You can also choose Skip for now and pick a plan later. The plan you choose here caps how many tables step 4 will let you create, and you can change it at any time under subscription and billing.
3

Branch

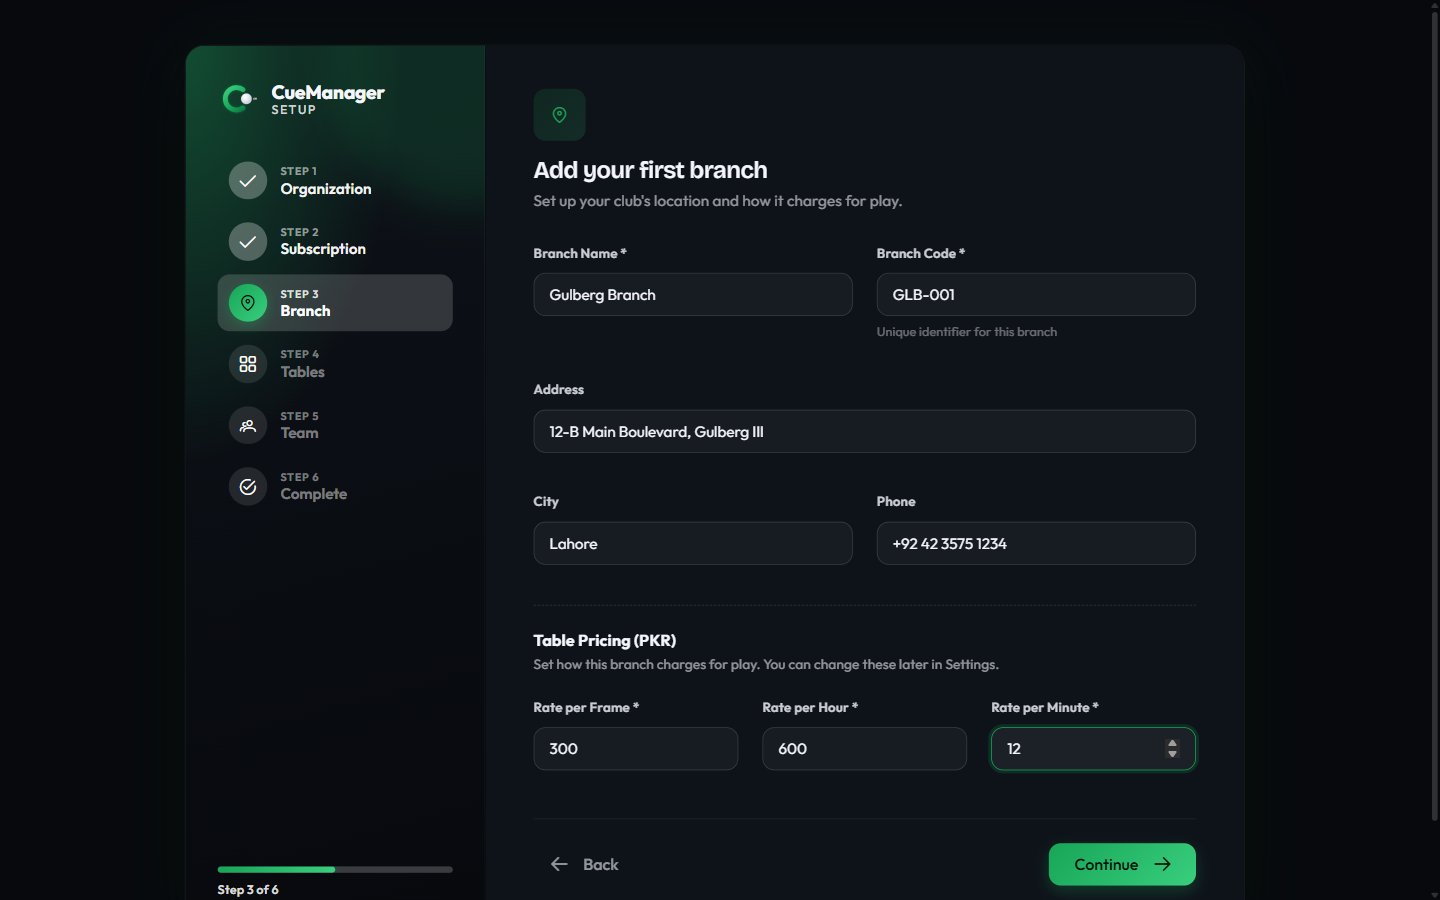
Onboarding step 3 with branch name, code, address, and table pricing rates

Step 3 creates your first location and its play rates

A branch is one physical location. Branch Name and Branch Code are required — the code is a short unique identifier for the branch, such as GULBERG-01. Address, City, and Phone are optional. For the demo club: “Gulberg Branch”, Lahore.The Table Pricing section sets how this branch charges for play, in your chosen currency:These become the defaults offered when staff start a session; the session dialog still lets them override the rate. Separate snooker and pool rates, and per-table overrides, are configured after setup in Settings and managing tables. See how billing works for what each mode charges.Choose Continue.
4

Tables
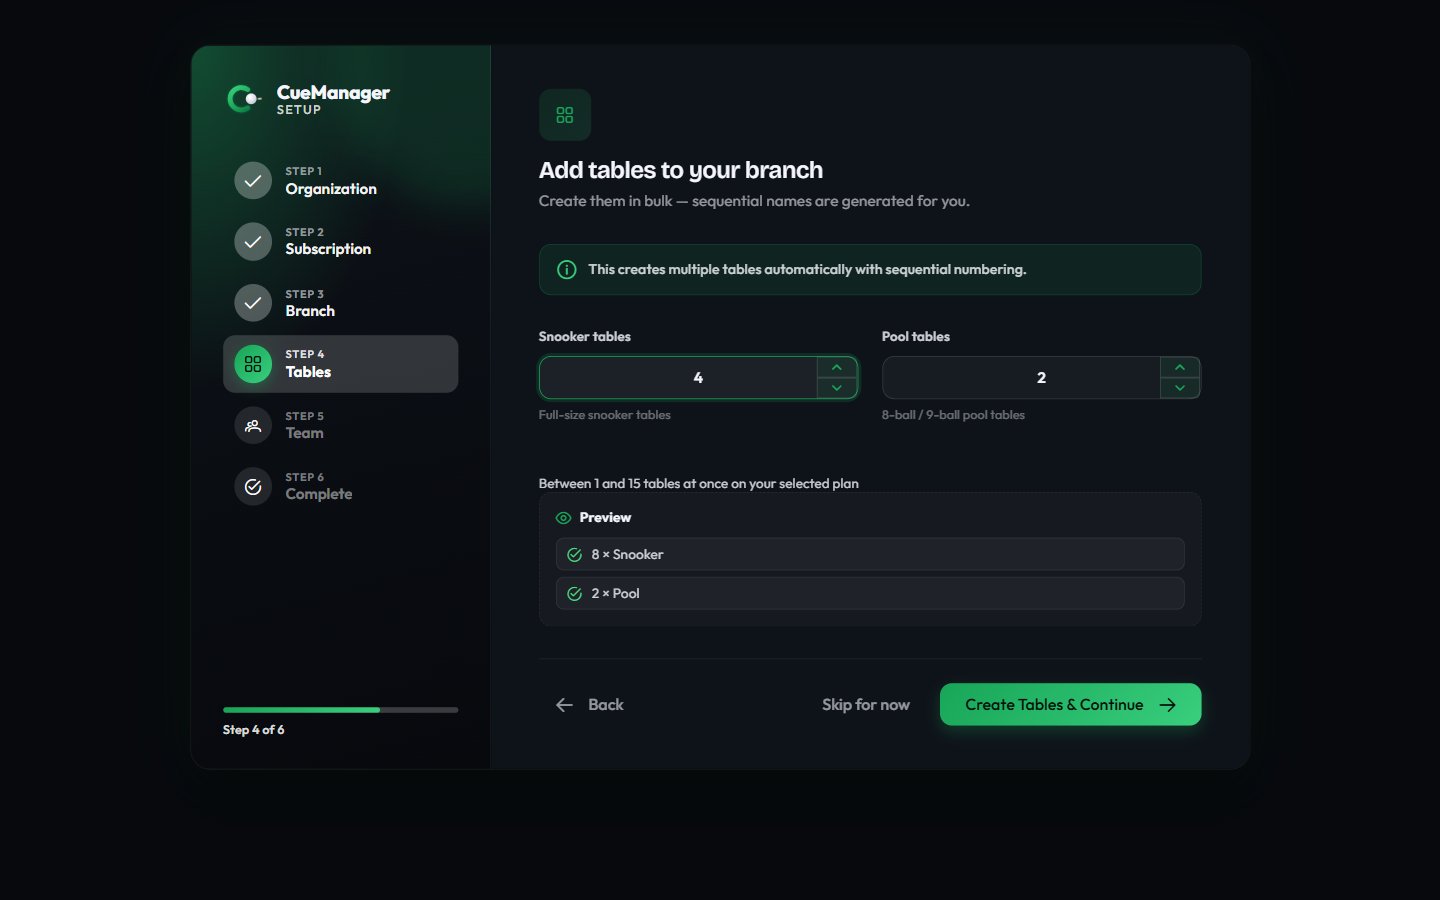
Onboarding step 4 with snooker and pool table counts and a preview of generated table names

Step 4 creates snooker and pool tables in bulk

Enter how many Snooker tables and Pool tables the branch has. CueManager creates them in bulk with sequential names and shows a Preview before you commit — 4 snooker and 2 pool tables become Snooker 1-4 and Pool 1-2, exactly the demo floor.You must add at least one table, and the combined total cannot exceed the table limit of the plan you selected in step 2. Choose Create Tables & Continue, or Skip for now and add tables later from Table Management.
Table type matters at play time: snooker is not offered as a game type on a pool table, and rates can differ per type.
5

Team
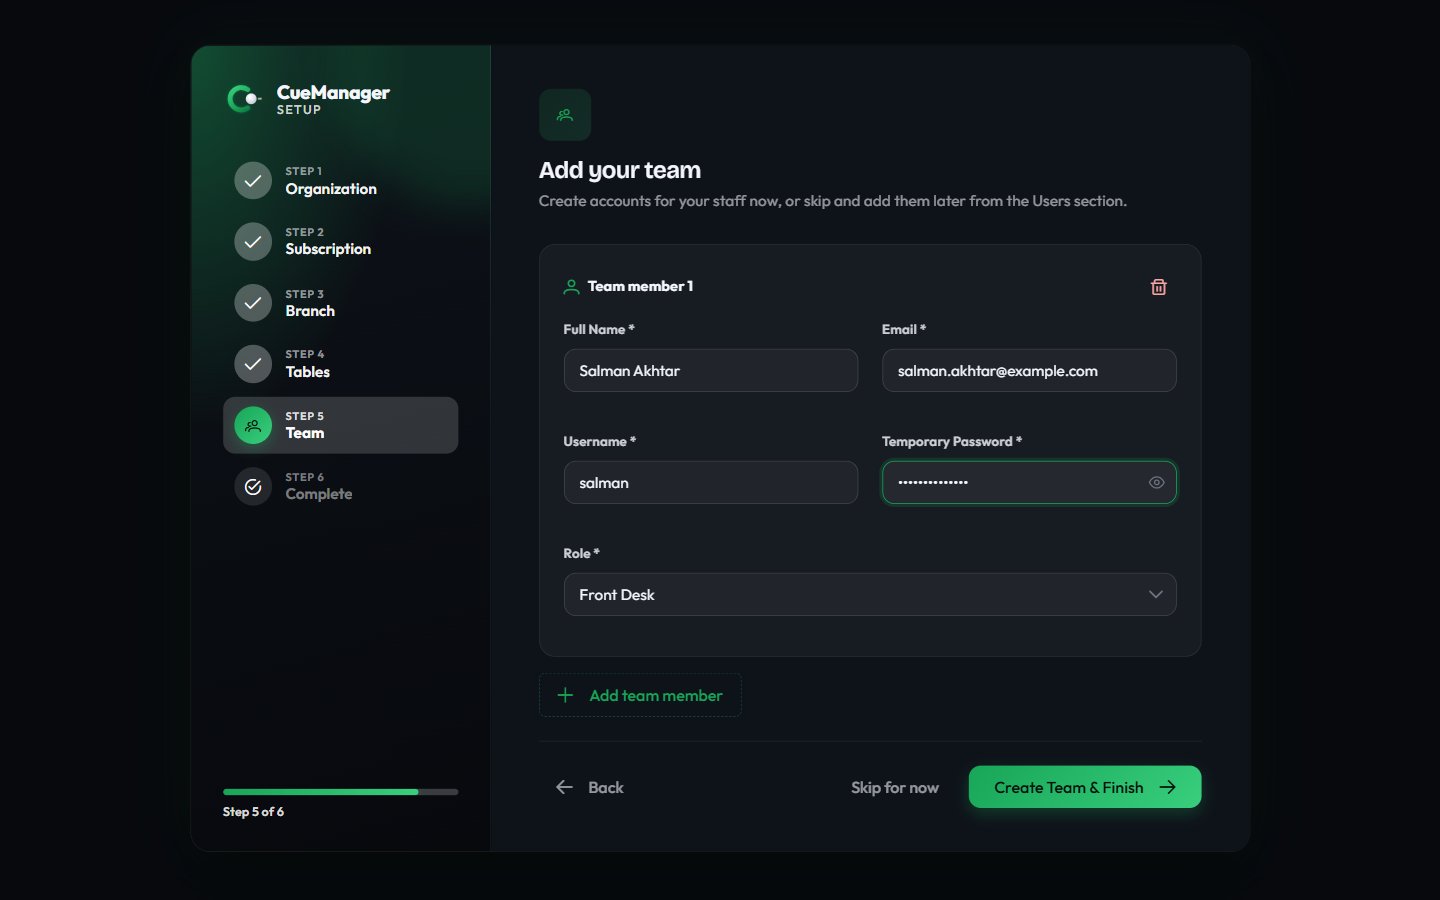
Onboarding step 5 with team member name, email, username, temporary password, and role

Step 5 creates staff accounts, or skip and invite them later

Add each staff member with Full Name, Email, Username, a Temporary Password (at least 6 characters), and a Role: Branch Manager, Front Desk, POS Staff, or Marker. Choose Add team member for another row, then Create Team & Finish.Staff sign in with the username you set here, not with an email registration of their own. Ask them to change the temporary password after their first sign-in.This step is optional — choose Skip for now or Finish Setup and add people later from Users, where you can also tune each person’s permissions module by module.If a username or email collides with an existing one, the wizard reports which entries failed, keeps the ones that succeeded, and lets you fix the rest and try again.
6

Complete

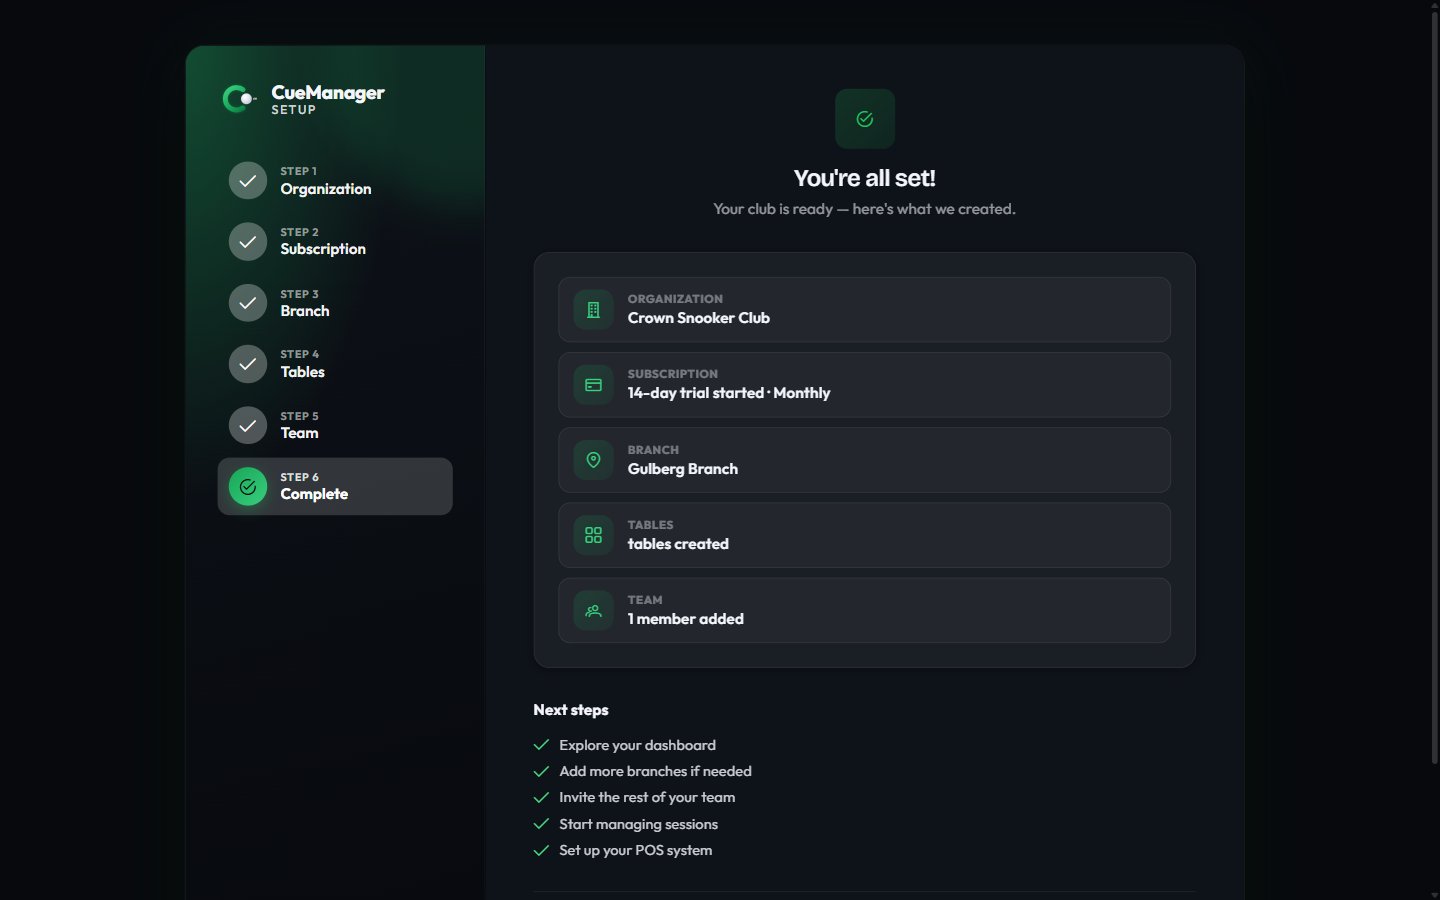
Onboarding completion summary listing the organization, subscription, branch, tables, and team created

The summary confirms what was created and links you to the dashboard

You’re all set! summarizes what was created: the organization, the trial subscription, the branch, the number of tables, and the team members added. A Next steps list points at exploring the dashboard, adding more branches, inviting the rest of your team, starting sessions, and setting up the POS.Choose Go to Dashboard to enter the app.

After setup

Tour the dashboard

Live counts, quick actions, the daily briefing, and the operations console.

Bill your first session

Start a session on Snooker 1 and take payment.

Stock the POS

Add categories and items such as Chai at Rs 100.

Add members

Profiles, wallets, and membership plans.